This post contains affiliate links, which means I make a small commission at no extra cost to you. See my full disclosure here.
The dough has hit the fan. Come along as I try different methods of Saving My Sourdough Dough that went (way) too far and compare the final results.
Be warned, this is going to be a little bit more sciency than my Easy Everyday Sourdough Bread.
Disclaimer.
I am not a mathematician nor a scientist.
I am just a mother who loves sourdough experiments, and hate to feel defeated by a DOUGH!
My Recipe for 6 x White sourdough loaves at 68% hydration
Easy Everyday Sourdough Bread Recipe
- 3210g Flour
- 2040g Water
- 600g Sourdough starter
- 60g Salt
- 150g Coconut oil
Method
- Mix flour and water to autolyse for 20min.
- Then add all of the rest of the ingredients and mix until oil is well absorbed.
- Do 2 stretch and folds 15min apart, and 3 coil folds 30min apart.
- Now leave dough to rise until 30% risen. (Did not happen exactly)
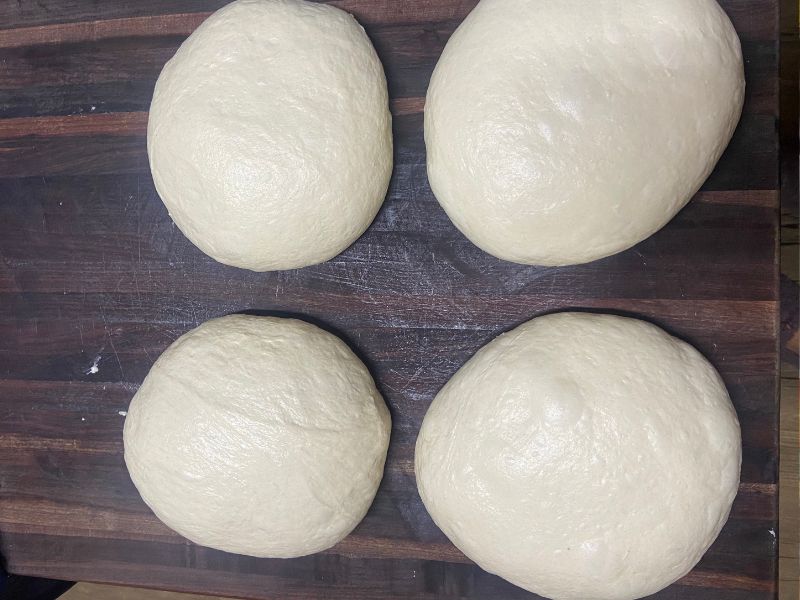
- Divide and pre-shape.
- Rest 15min.
- Final shaping.
- Into fridge for overnight fermentation.
Notes
Right now it is winter where we are, and I always struggle more to get the dough to rise during the winter and get it to slow down again in the fridge. But I have a very strong starter (obviously), that rises very fast and strong once it gets going. So in my base recipe I adjusted the starter from 20% bakers% to 10%. I thought it would be safe to increase my starter and leave it through the night on the counter since it was so cold.
Also, usually I mix in the morning and put the dough, shaped and ready to bake in fridge for the night. This time, I wanted to try to not use the fridge, as I feel my fridge is very bad at holding even temperature for the dough.
Apparently not a great idea.
Timeline
DAY 1
- 16:30 Mix
- 17:00 Finish final mixing
- 17:15 Stretch and fold #1
- 17:30 Stretch and fold #2
- 18:00 Coil fold #1
- 18:30 Coil fold #2
- 19:00 Coil fold #3
- Leave for the night on the counter. Room temp @ 12°C. Did not measure dough temp.
DAY 2
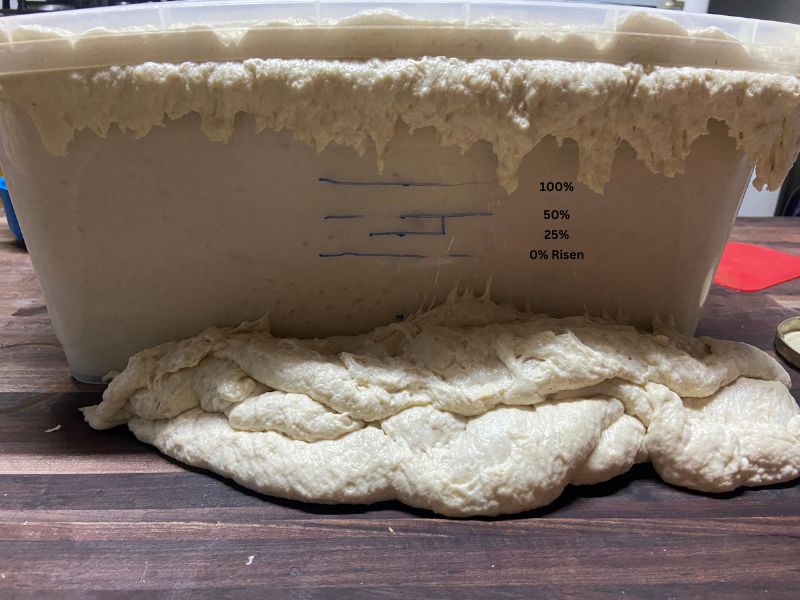
- 06:00 This monstrosity greeted me. (Cloudy with a chance of meatballs moment.)
Honestly, I was a little flatlined for a moment…
And then my brain started working and I thought of a few different ways to save what I could from the dough.
Rescue mission: Saving My Sourdough Dough
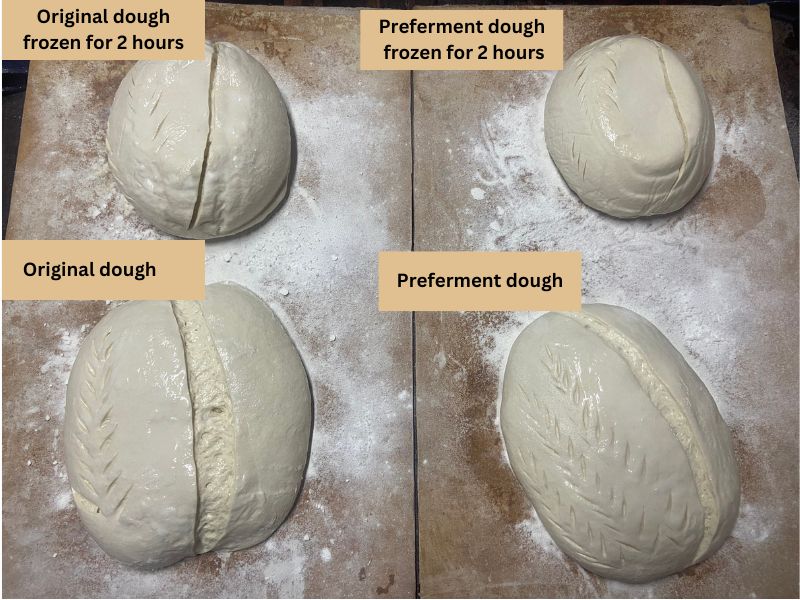
Test 1 – To compare, I am going to continue normally with 2 loaves, dividing, shaping and putting them into free-form bowls to do final rise in the fridge and open bake the next day (Day 3).
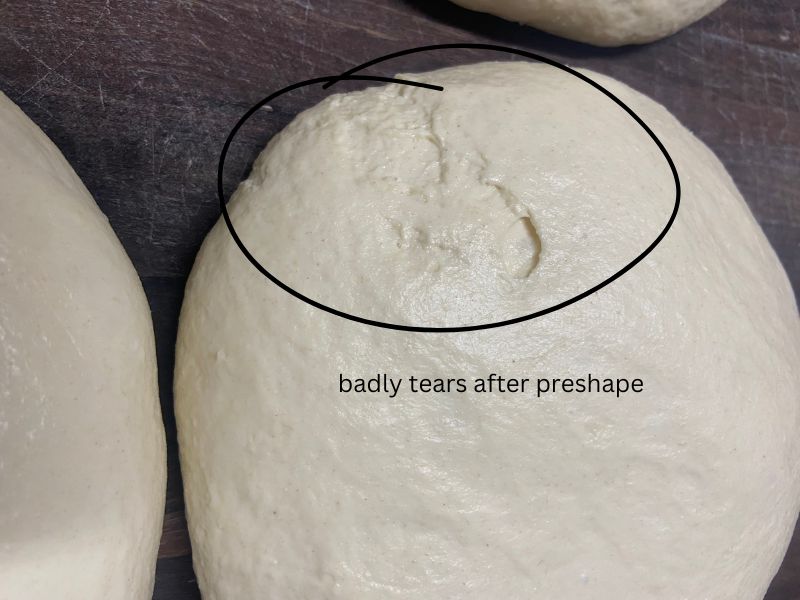
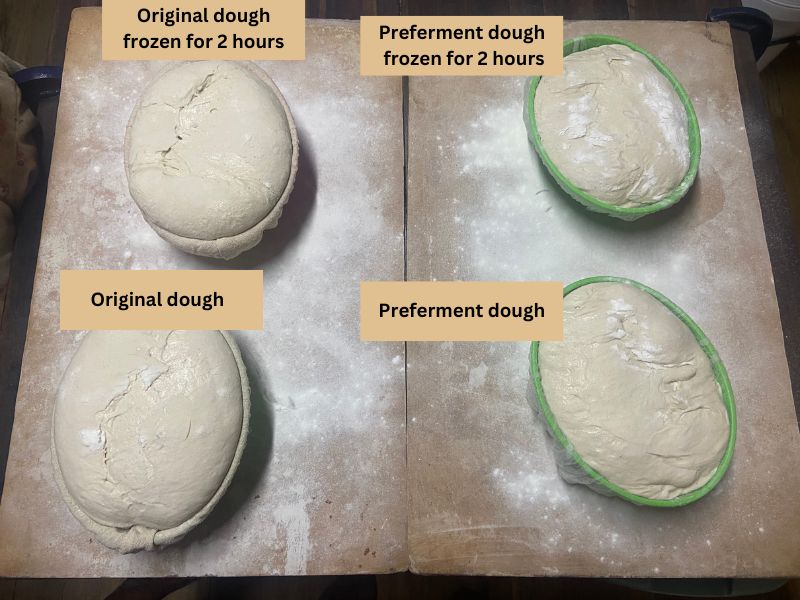
Here you can see the dough tearing because the gluten structure is damaged because it was left for too long. This will also happen when gluten did not sufficiently develop during the stretch and fold process.
1.1 One of these loaves I will freeze for 2hours before open baking.
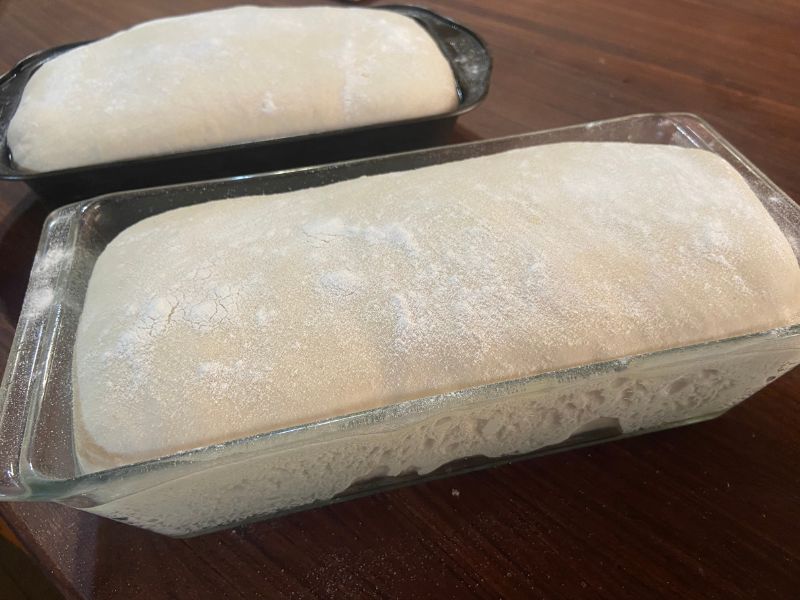
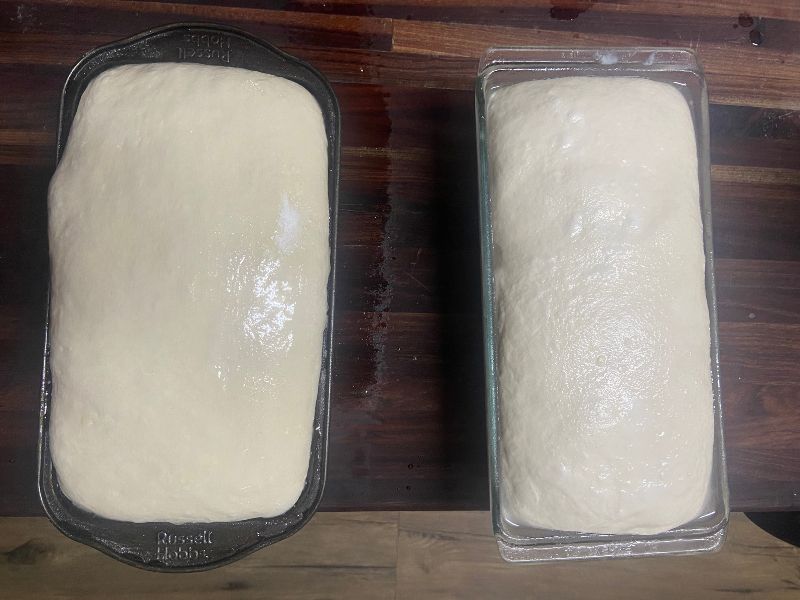
Test 2 – I will take two loaves and put them into buttered bread pans to do final rise and bake in the bread pans.
Test 3 – I am going to use the rest of the dough as a preferment, add flour, water and salt and make a new dough, wait to rise again, pre-shape, final shape and put into free-form bowls to final rise in the fridge and open bake 2 of these loaves to compare the next day.
3.1 – One of these I will freeze for 2 hours before baking.
Recipe for Saving My Sourdough Dough with preferment
- 1540g (70%) Water
- 2200g (100%) Flour
- 2200g (100%) Starter / preferment / dough from previous day
- 40g (2%) Salt
Method for Saving My Sourdough Dough with preferment
- Mix flour and water to autolyse for 20min.
- Then add all of the rest of the ingredients and mix until oil is well absorbed.
- Do 2 stretch and folds 15min apart, and 3 coil folds 30min apart.
- Now leave dough to rise until 30% risen.
- Divide and pre-shape.
- Rest 15min.
- Final shaping.
- Into fridge for overnight fermentation.
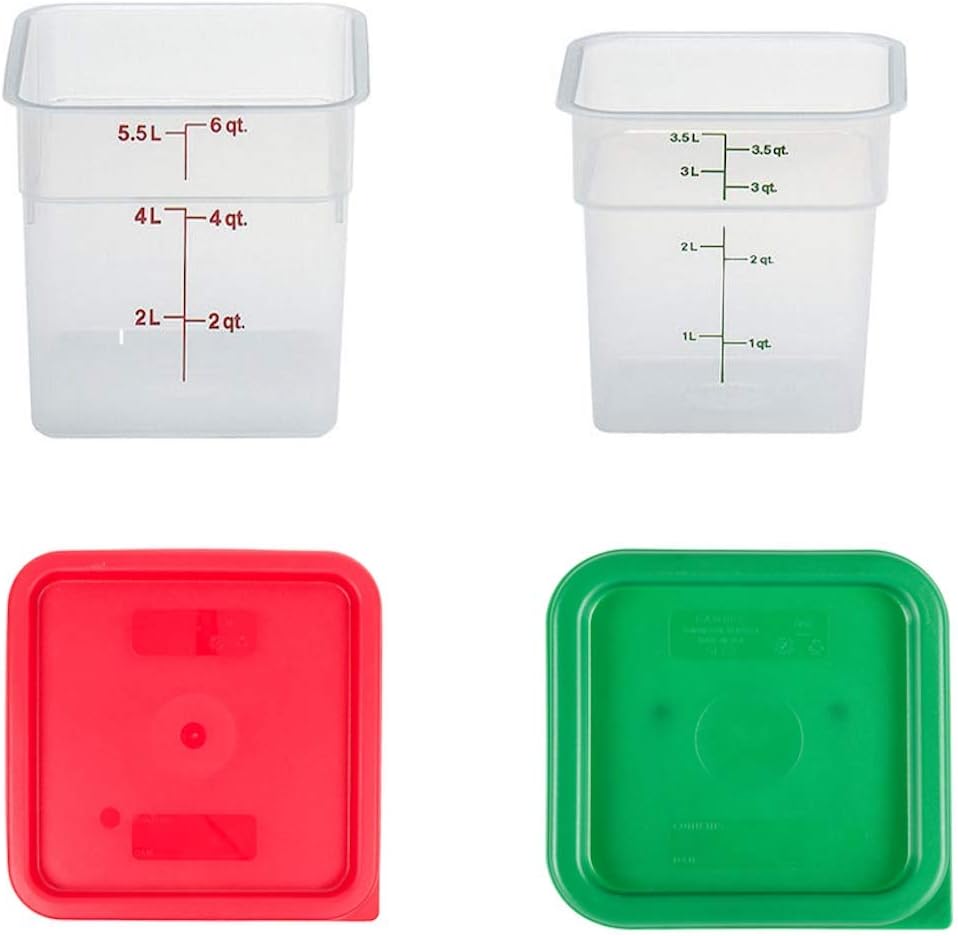
This Cambro container works perfectly to see accurately how your dough is rising. You can make a mark on the side with a wet erase marker at current dough level and at the percentage where you want to stop fermentation. You can find it here.
Timeline
- 08:00 Mix
- 08:15 Stretch and fold #1
- 08:30 Stretch and fold #2
- 09:00 Coil fold #1
- 09:30 Coil fold #2
- 10:00 Coil fold #3
- Leave on the counter until risen 30%.
- 16:00 Divided and pre-shaped
- Rest for 10min
- Final shaping, put into moulds
- 16:30 Into fridge for the night
Procedure of baking day
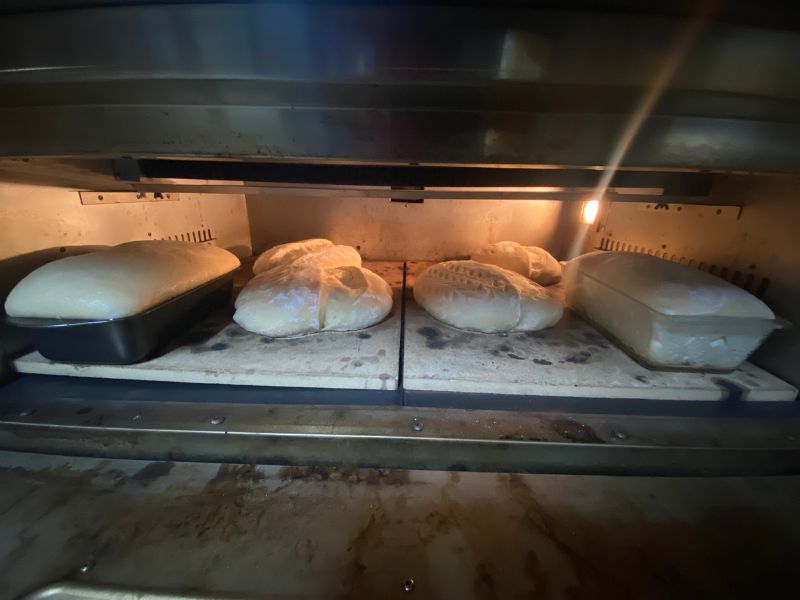
I open bake multiple loaves in a gas bread oven on a pizza stone.
Bake time is usually 60min.
Top element at 200°C, bottom element set to 265°C.
Spray dough with water before putting into oven, at 5min, 10min and 15min into baking.
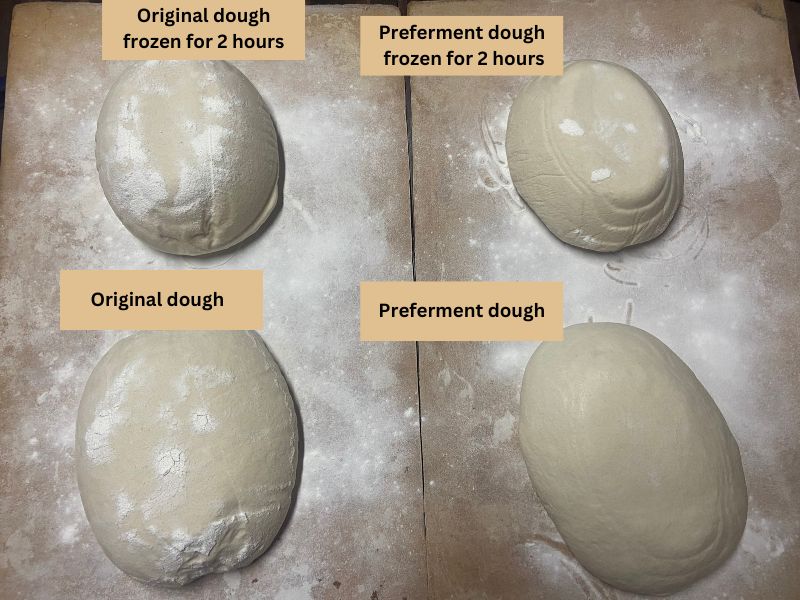
Here are the pictures on bake day:
DAY 3

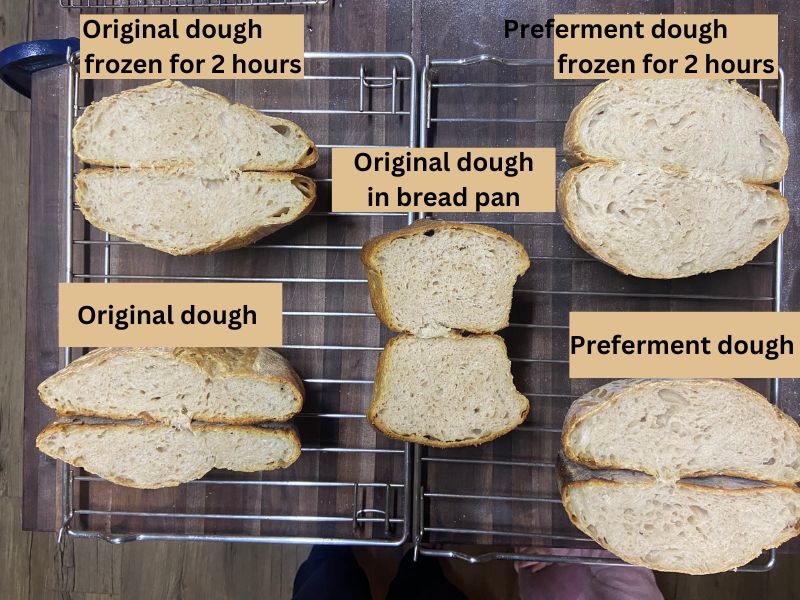
Conclusion
1. Original dough
- Crust – very hard, difficult to cut.
- Crumb – the crumb started to deteriorate and the bread lost its structure completely.
- Taste – Very sour, not everyone will like it this sour.
2. Original dough, frozen for 2hours
- Crust – Hard, a little better than original dough.
- Crumb – Freezing a little did help to keep some of the breads structure, still visibly deteriorating.
- Taste – Very sour.
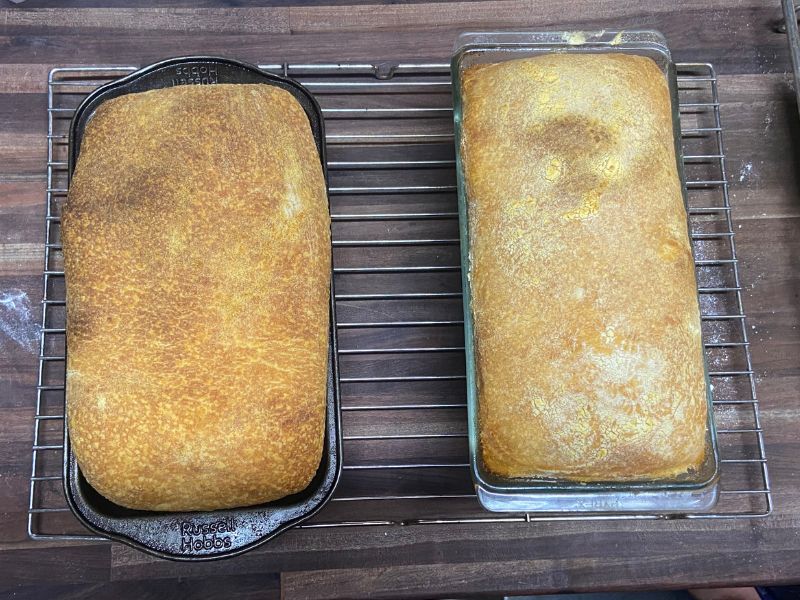
3. Original dough in bread pan
- Crust – Significantly softer compared to previous two test batches.
- Crumb – Structured well, although signs of deterioration is visible.
- Taste – Very sour.
4. Preferment dough
- Crust – Thin, crusty, easily cut.
- Crumb – Beautifully soft, signs of over fermentation starting but not significant.
- Taste – Perfect balance of sourness, soft, chewy and crunchy crust.
5. Preferment dough, frozen for 2 hours
- Crust – Thin, crusty, easily cut.
- Crumb – Best structure of all, well fermented, did not loose any structure during baking.
- Taste – Perfect balance of sourness, soft, chewy and crunchy crust.
Was Saving My Sourdough Dough Successful?
Depending on your taste, you could definitely save a dough that fermented too far by shaping or re-shaping carefully and putting it into bread pans to rise again and bake. Just know the taste will be quite sour. 3 days was pushing the limits with taste, I would say.
In my opinion the very best loaf was the preferment one that was frozen for 2 hours. It looked the best and it tasted wonderful.
What is bakers percentage?
Bakers% is a method of analysing a recipe to make it easier to scale up or down without mistakes.
The flour will always be 100%, and all the other ingredients will be measured in relation to the flour.
For example, with formula from grams to %.
- 500g flour 100%
- 400g water 80% ((400g/500g flour)x100%)
- 100g starter 20% ((100g/500g flour)x100%)
- 10g salt 2% ((10g/500g flour)x100%)
Once you have the percentages you can start with any amount of flour and get the exact weights of the rest of the ingredients. For example:
- 100% flour @ 800g
- 80% water (800g flour/100%) x 80 = 640g
- 20% starter (800g flour/100%) x 20 = 160g
- 2% salt (800g flour/100%) x 2 = 16g
and there is your new recipe.
More (normal) Sourdough Recipes
- Easy Everyday Sourdough Recipe – with a secret
- Cheesy Cheddar Sourdough Bread
- Sourdough Chocolate Bread
- Sweet Sourdough Dinner Rolls or South African “Boerebeskuit”
Healthy And Delicious Recipes
- Healthy, Spiced Milk For Winter Colds, Flu Or A Sore Throat
- How to make The Best Granola Ever in only 20min on the stovetop
My favourite Sourdough gadgets
Cast iron dutch oven

Sourdough kit
Kitchen scale