This post contains affiliate links, which means I make a small commission at no extra cost to you. See my full disclosure here.
Does making Sourdough Bread make you nervous? Join me in overcoming your fear of Sourdough with my Easy Everyday Sourdough Bread recipe. It does not need to be complicated.
Here I explain every step and give you my honest opinion and tips.
Sourdough always intimidated me until…
I started researching and learned all the benefits to using unbleached flour and fermenting that flour into something extremely nutritious and tasty with a mixture of textures from crunch in your mouth to buttery softness and a delightful chewiness al in one bite! But the most convincing factor to me was the benefits for your gut, and after a few months of experimenting, even though my results were not consistent yet, my health improved so much that I could stop medication that I had to drink everyday for years for my gut. THAT was evidence enough for me to persist and continue on this journey of sourdough-ing!
It can be as easy or difficult as you want to make it
If you choose to make sourdough purely for health reasons without breaking your head about consistency, getting a perfect ‘ear’, or large blisters, or whatever makes the popular headlines sing and videos getting thousands of views, let me be the one to tell you, you don’t need all that. Just understand the timeline. Mix, let rise, cold ferment, bake and that is it!
On the other hand. If you are like me and love experimenting, like getting good to perfect results… Good luck. The whole Sourdough process proves to get more complicated the more you want to get it perfect. It will kick your backside just when you think, “Now I am good at it!”, and keep you humble and almost tempt you to give up. I have been there more times then I can count.
But this is where the addicting part kicks in. After just a few days you start remembering that feeling when you open your oven and see the most beautiful bread ever, perfect in every way. You can just see yourself walking into a bakery in Germany with fresh crispy bread with the most delicious smells. Only, you made this yourself, in your own home, with your own hands. Almost too scared to cut into it, but you can’t wait to see the ‘crumb’ so you do cut into it and ‘WOW’, it is just perfect! Taking your first bite even without butter or anything else and the dream about a bakery in your favourite destination continues. Then add a proper dollop of butter and just when you thought it can’t get any better, it does!
So you see, it is a love-hate relationship.
Today we will take a look at the Easy Everyday Sourdough Bread recipe and method
Important notes
- You do need an active starter.
- For the best health benefits you need the best un-bleached flour you can find and afford.
- You will also need non-iodised salt.
Why non-iodised salt?
Does salt kill yeast? No, it does not. It does inhibit yeast growth and reproduction, though. But you can certainly add salt and yeast at the same time without any ill side effect. Salt is very important for the process of gluten development. Without salt the gluten network will start to deteriorate very quickly,. The result will be flat bread that has very little taste. I recommend non-iodised salt because of the chemicals added that can leave an aftertaste. With bread for health benefits you do want to use the best quality ingredients possible.
What is a Sourdough Starter?
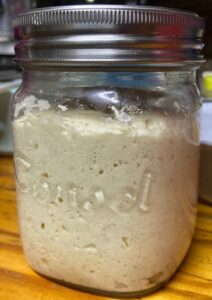
A Sourdough Starter is a live culture that consists of wild yeast in the air and friendly bacteria in flour, on counter tops and on hands, that live in a symbiotic relationship. Its food is the starch in flour and sugar if added. It excretes carbon dioxide that causes bubbles and the dough to rise.
For instructions on how to make your own Sourdough Starter please refer to this post here. Another good option is to ask around in your community or at your local bakeries or you can buy a starter online. I have no experience with buying online, I made my starter from scratch 4 years ago and never had to buy another.
Tools I recommend when baking Sourdough Bread
Tools are always nice to have and sometimes makes a process easier, but you can definitely make Sourdough Bread without any of these tools. I will explain below why I recommend these tools that I use every time I bake.
Kitchen scale
- To get a consistent outcome with your baking, a proper scale is one of the first and most important tools to start with. When using cups and millilitres to measure, there are too many variables that can have an effect on your outcome.
See-through bowls with straight sides
- One of the ways to measure if your dough has risen is to see how much volume it consists of compared to what you have started with. A see-through bowl with straight sides works perfectly when marked with a wet erase marker at the dough level just after mixing and marking the spot where you want to stop bulk rise.
Thermometer
- To measure water temperature and dough temperature. To cut out a lot of frustration and questions during the loooong process of Sourdough Bread baking, using a good instant read thermometer will give you an idea of why your dough is sluggish and take longer than the expected time to rise. Using an oven surface thermometer will help a lot with a variable few people know about. Your oven temperature is rarely accurate.
- Room thermometer. (I bought from Takealot in South Africa, but these are widely available)
- Instant read thermometer.(I bought from Takealot in South Africa, but these are widely available)
- Oven surface thermometer. (I bought from Takealot in South Africa, but these are widely available)
Plastic dough scraper
- I prefer to stay away from plastic as much as possible, but for a dough scraper I have found that the bending ability of a plastic scraper helps so much when working with the dough. Whether you are scraping out the dough from the bowl, or dividing it and shaping it on the table. It will also be much gentler on your kitchen counter than a metal one. (I bought from Takealot in South Africa, but these are widely available)
Rice flour
- Rice flour, rice flour, rice flour. The best solution to dough sticking to your cloths after cold retard! I have tried normal flour, corn flour, semolina. Nothing works like rice flour to not stick, because it does not get absorbed by the dough. It stays on the surface and creates a barrier between the dough and the cloth.
So what is the big SECRET?
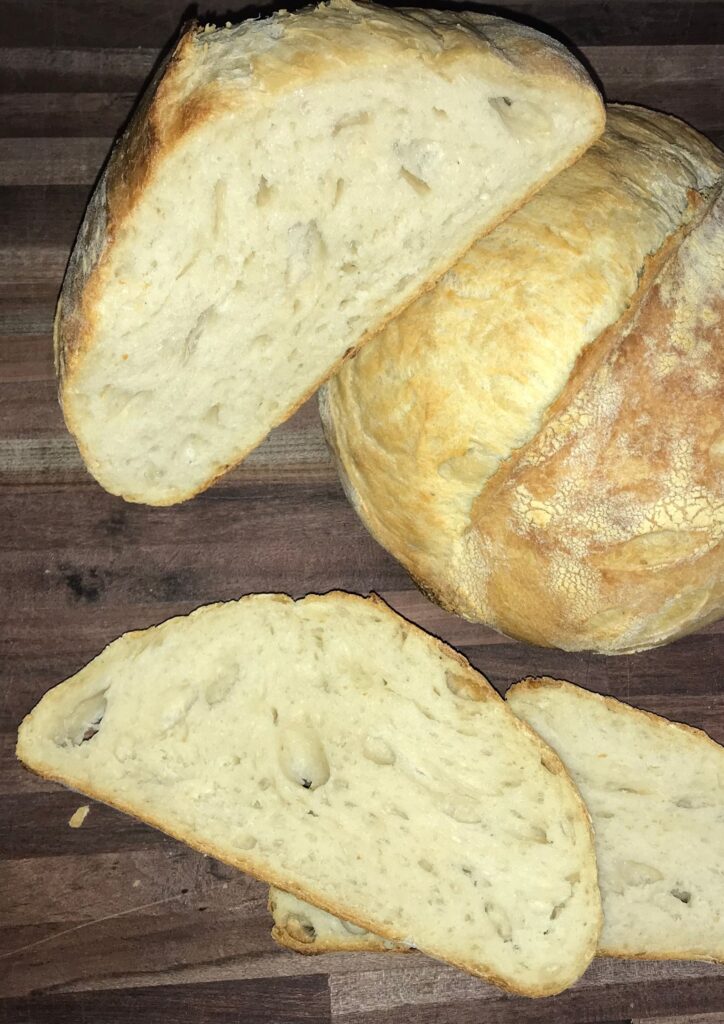
One of the very prominent characteristics of Sourdough Bread is its crust. It started not by preference but because of the method of baking in a wood fired oven. This method resulted in a crispy, dark golden almost (or sometimes truly) charred outside. Over the years of development it became part of the character of the bread and people started loving the contrast and different textures and flavours of the crispy golden outside and the soft chewy inside.
Problem is, we are either too used to today’s conventional, soft, texture-less, taste-less shop bread or have sensitive teeth or are a child that struggles to bite and chew through the crispy golden crust, or your poor bread knife begs you: “Please just use the chainsaw!” For some people the crust is a real downer on the bread, no matter how lovely the inside.
So I went on a research hunt: How to make a Sourdough Bread crust thinner and not so hard to get through?
Conclusion and big secret unveiled:
Butter or Oil
At 5% Bakers percentage, I have found it to be the perfect balance of crispiness but still manageable for slicing, biting and chewing. I recommend using a flavourless oil like coconut oil, or for extra intense flavour, salted butter.
Ingredients of Easy Everyday Sourdough Bread
365g Water
560g Unbleached White Bread Flour
50g Active Sourdough Starter
10g Non-iodised Salt
25g Melted Coconut oil
Method of Easy Everyday Sourdough Bread
- Mix water and flour until no dry flour is visible.
- Cover and let sit for 20min to 2 hours.
- Add Sourdough starter, salt and oil and mix until no more oil is visible.
- For the ‘health only’ option, add the dough to a greased bread pan and leave in room temperature for 4 hours.
- Put in fridge for 8 to 24 hours, for full fermentation benefits, or even longer until you are ready to bake.
- On bake day take the bread out of the fridge and let rise until nice and puffy, could be 2- 4 hours depending on your room temperature.
- Preheat the oven to 200°C.
- Bake bread for 45min, if it needs colour add 5min bake time until desired colour is reached.
- Let cool for 10 minutes then remove from bread pan.
- For best texture let cool completely or at least 1 hour before slicing.
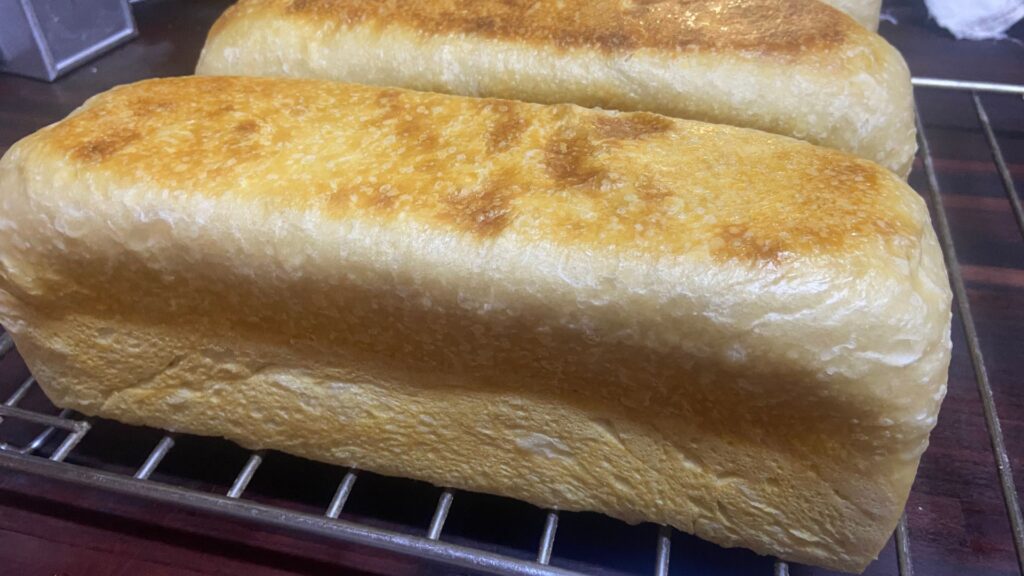
Here is one of my ‘Sourdough pan Breads’ with stretch and fold method.
ALTERNATIVE STRETCH AND FOLD METHOD FOR BETTER RISE
If you desire a better rise and or baking in a dutch oven, follow the next steps.
4. Cover and let rest for 15min.
5. Do stretch and folds all around the dough.
6. Cover and let rest 15min.
7. Coil fold all 4 sides.
8. Cover and let rest 15min.
9. Coil fold all 4 sides.
10. Cover and let rest 30min.
11. Coil fold all 4 sides.
12. Let rise until about 30% risen.
13. Pre-shape.
14. Final shape into desired shape of proofing bowl.
15. Put upside down into a lined bowl dusted with rise flour.
16. Put into fridge for cold fermentation for 8 – 24 hours.
17. Preheat oven with dutch oven to 250°C.
18. Turn bread dough out onto baking paper.
19. Score bread: decorative scoring, and/or one functional score.
20. Mist with water and put carefully into dutch oven.
21. Bake for 30min with lid on, then 15min with lid removed or until desired golden colour.
22. Remove carefully from oven.
23. For best texture let cool completely for at least for 1 hour before slicing.
24. Enjoy!
Variations for Sourdough Bread
- Chocolate Sourdough Bread With Pecans
- Cheesy Cheddar Sourdough Bread
- Sourdough Olive and Roasted Garlic Bread
- Sourdough Jalapeno and Cheddar Bread
- Sourdough Cranberry and Pecan Bread
Easy Everyday Sourdough Bread

Sourdough
Ingredients
- 365g Water
- 560g Unbleached White Bread Flour
- 50g Active Sourdough Starter
- 10g Non-iodised Salt
- 25g Melted Coconut oil
Instructions
- Mix water and flour until there is no more flour visible.
- Cover and let sit for 20min to 2 hours.
- Add Sourdough starter, salt and oil and mix until no more oil is visible.
- For the 'health only' option, add the dough to a greased bread pan and leave in room temperature for 4 hours.
- Put in fridge for 8 to 24 hours, for full fermentation benefits, or even longer until you are ready to bake.
- On bake day take the bread out of the fridge and let rise until nice and puffy, could be 2- 4 hours depending on your room temperature.
- Preheat the oven to 200C.
- Bake bread for 45min, if it needs colour add 5min bake time until desired colour is reached.
- Let cool for 10 minutes then remove from bread pan.
- For best texture let cool completely or at least 1 hour before slicing.
ALTERNATIVE STRETCH AND FOLD METHOD FOR BETTER RISE
If you desire a better rise and or baking in a dutch oven, follow the next steps.
4. Cover and let rest for 15min.
5. Do stretch and folds all around the dough.
6. Cover and let rest 15min.
7. Coil fold all 4 sides.
8. Cover and let rest 15min.
9. Coil for all 4 sides.
10. Cover and let rest 30min.
11. Coil fold all 4 sides.
12. Let rise until about 30%.
13. Pre-shape
14. Final shape into desired shape of proofing bowl.
15. Put upside down into a lined bowl dusted with rise flour.
16. Put into fridge for cold fermentation for 8 - 24hours.
17. Preheat oven with baking steel or pizza stone to 250C.
18. Turn bread dough out onto the back of a rice floured coockie sheet.
19. Score bread decorative scoring and or one functional score.
20. Mist with water and slide carefully into oven.
21. At 5min, 10min and 15min, spray with water.
22. Bake for 45min or until desired golden colour.
23. Remove carefully from oven.
24. For best texture let cool completely or at least for 1 hour before slicing.
25. Enjoy!
My favourite Sourdough gadgets
Cast iron dutch oven

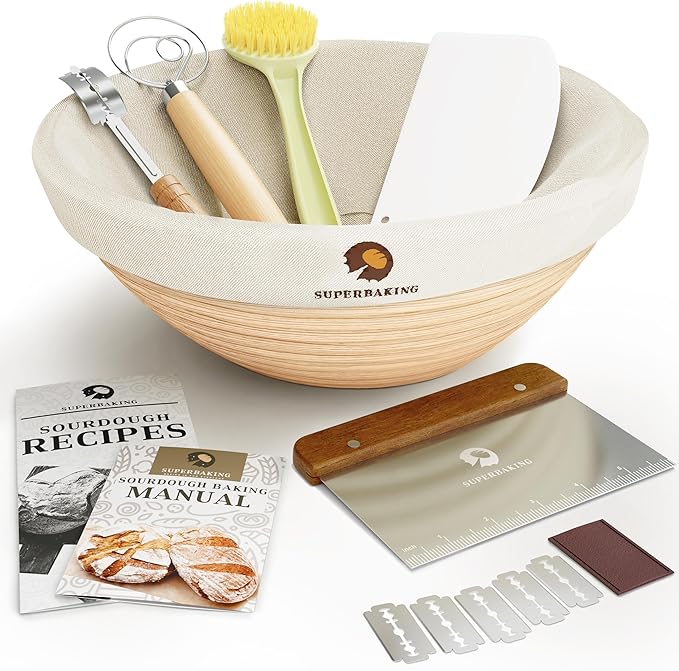
Sourdough kit
Kitchen scale

14 Responses